Client groups let you organise clients, for example Students or Corporate. You can send the whole group a message, or make a product or discount code available to that group only.
Creating a group
- Go to Clients → Client groups.
- Click New client group.
- Enter a Group name and, if you like, a Description.
- Switch on Visible to clients if clients may see that they belong to this group.
- Click Save.
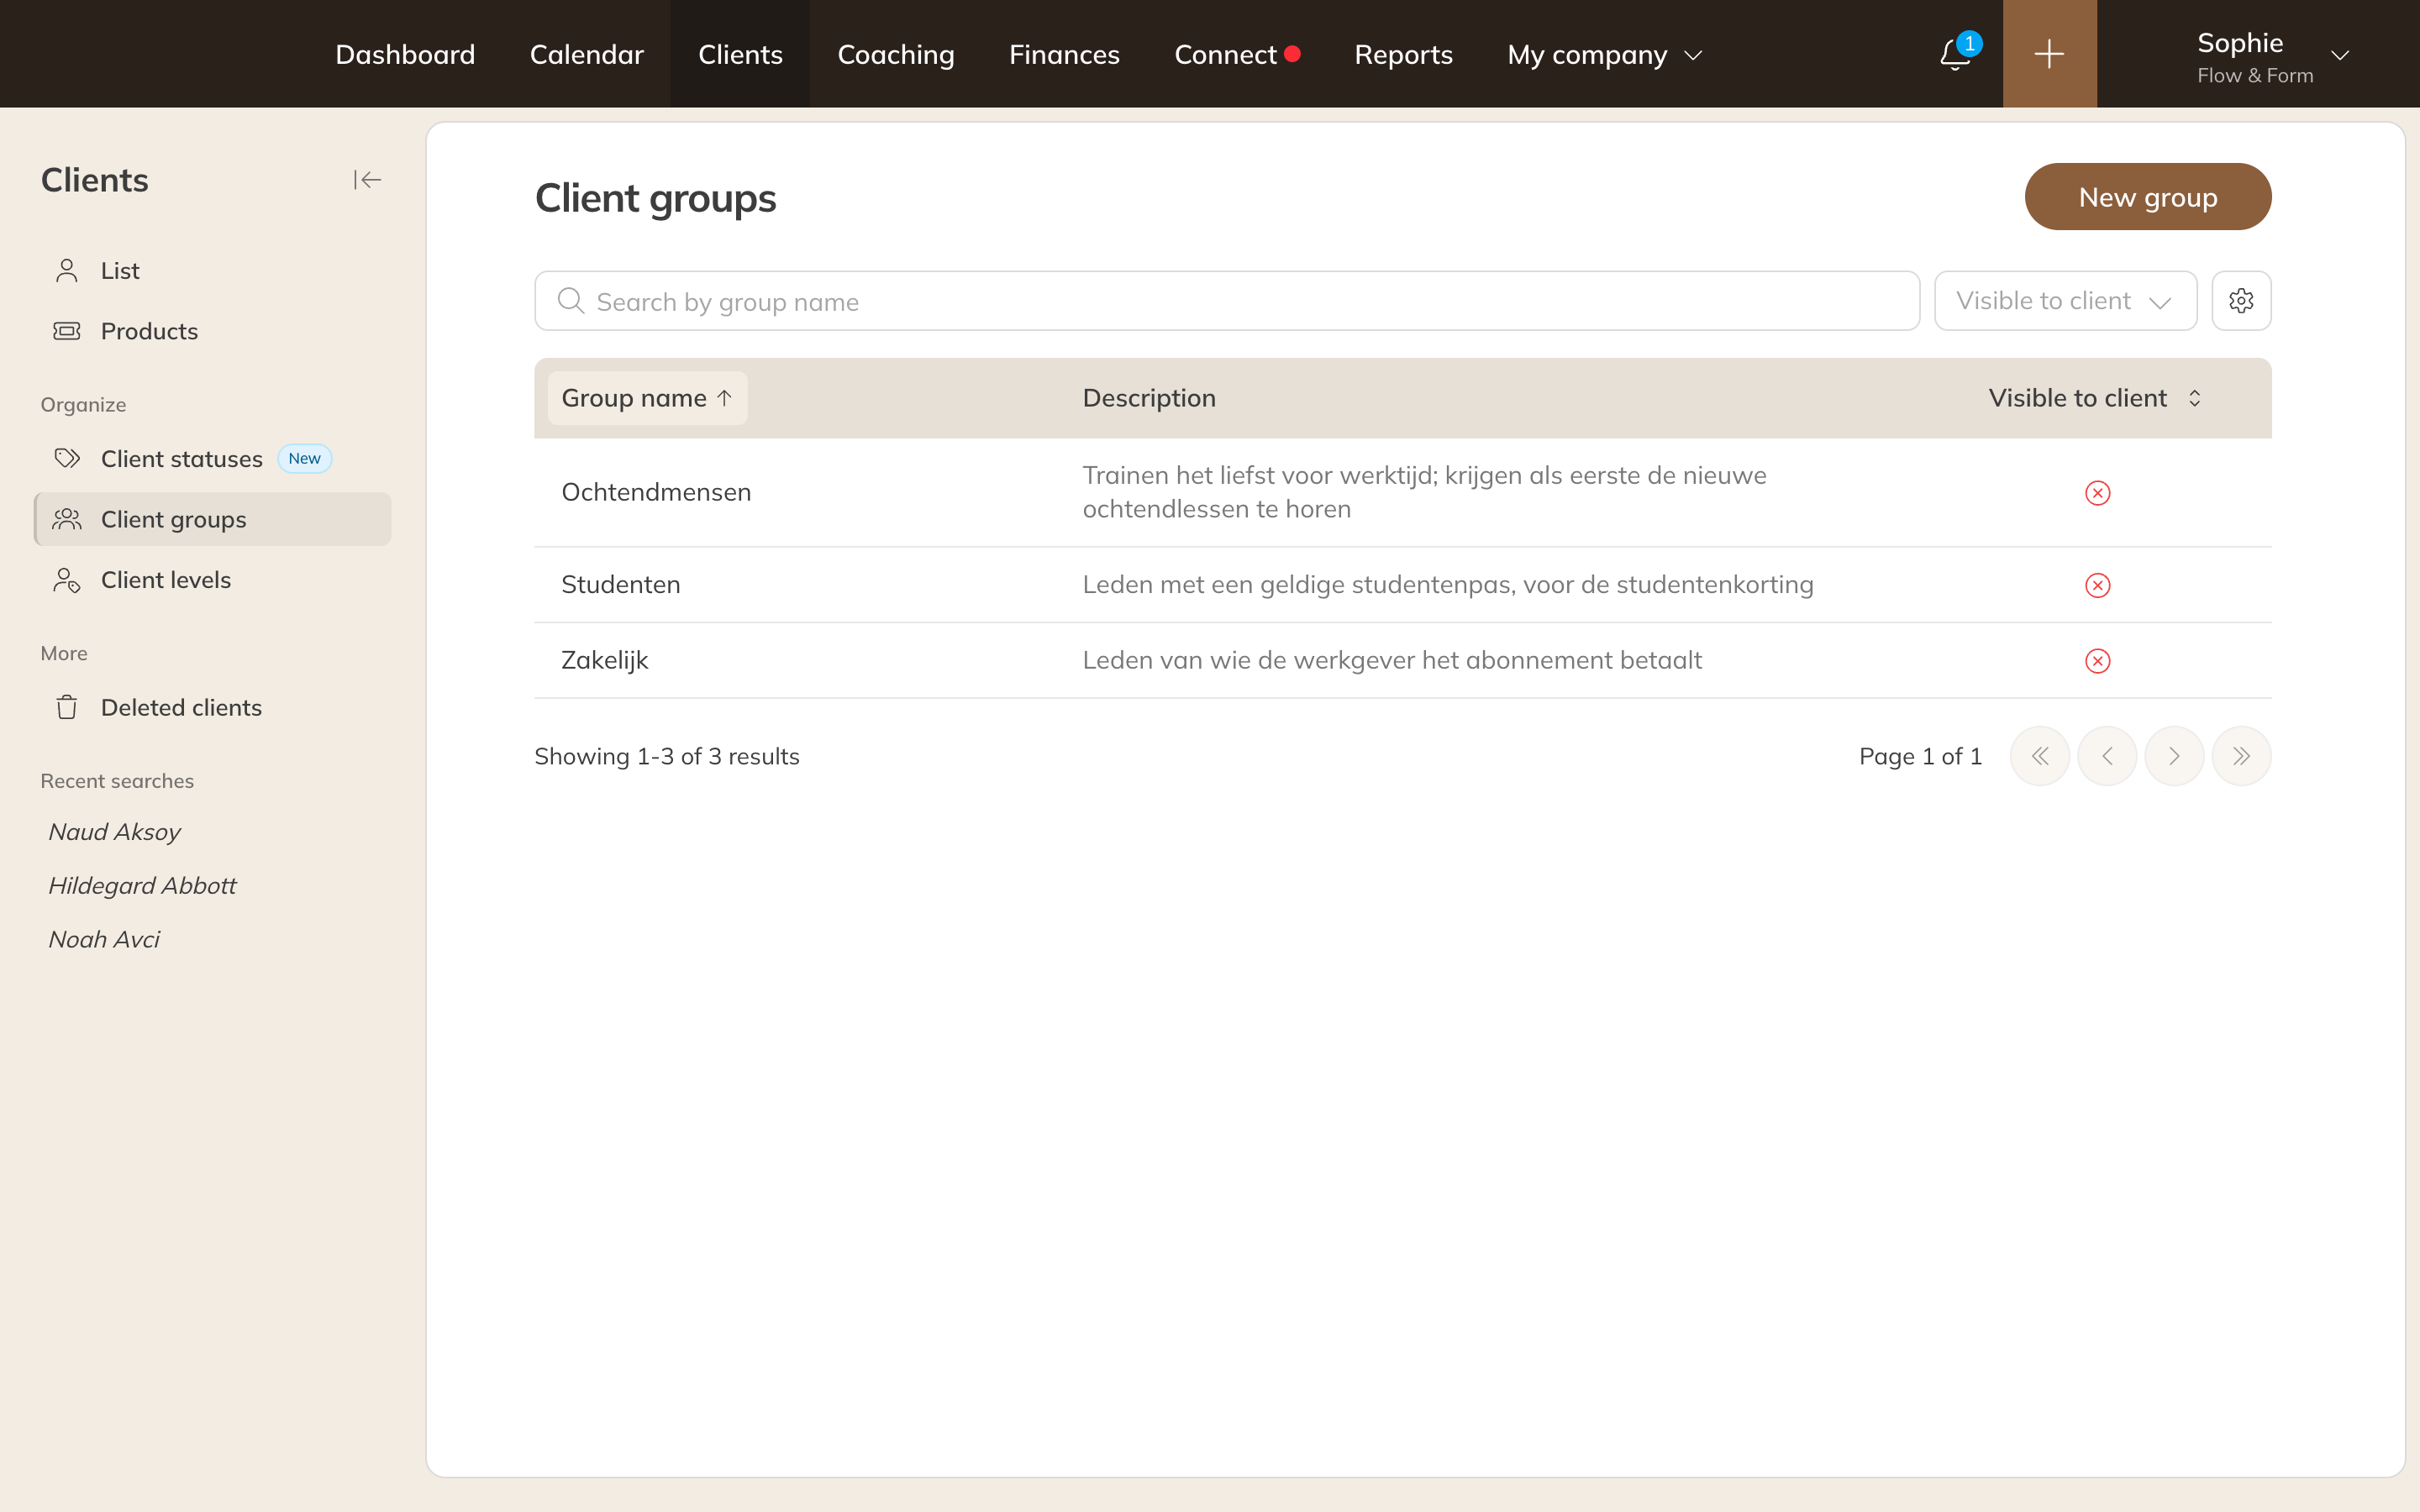
The client groups overview
Adding clients to a group
You can do this in three places:
- In the client list: click Options (the three dots) next to the client and choose Assign client group.
- In the client's profile: the Details tab, under Assignments next to Group.
- In the group itself: open the group and choose Assign client.
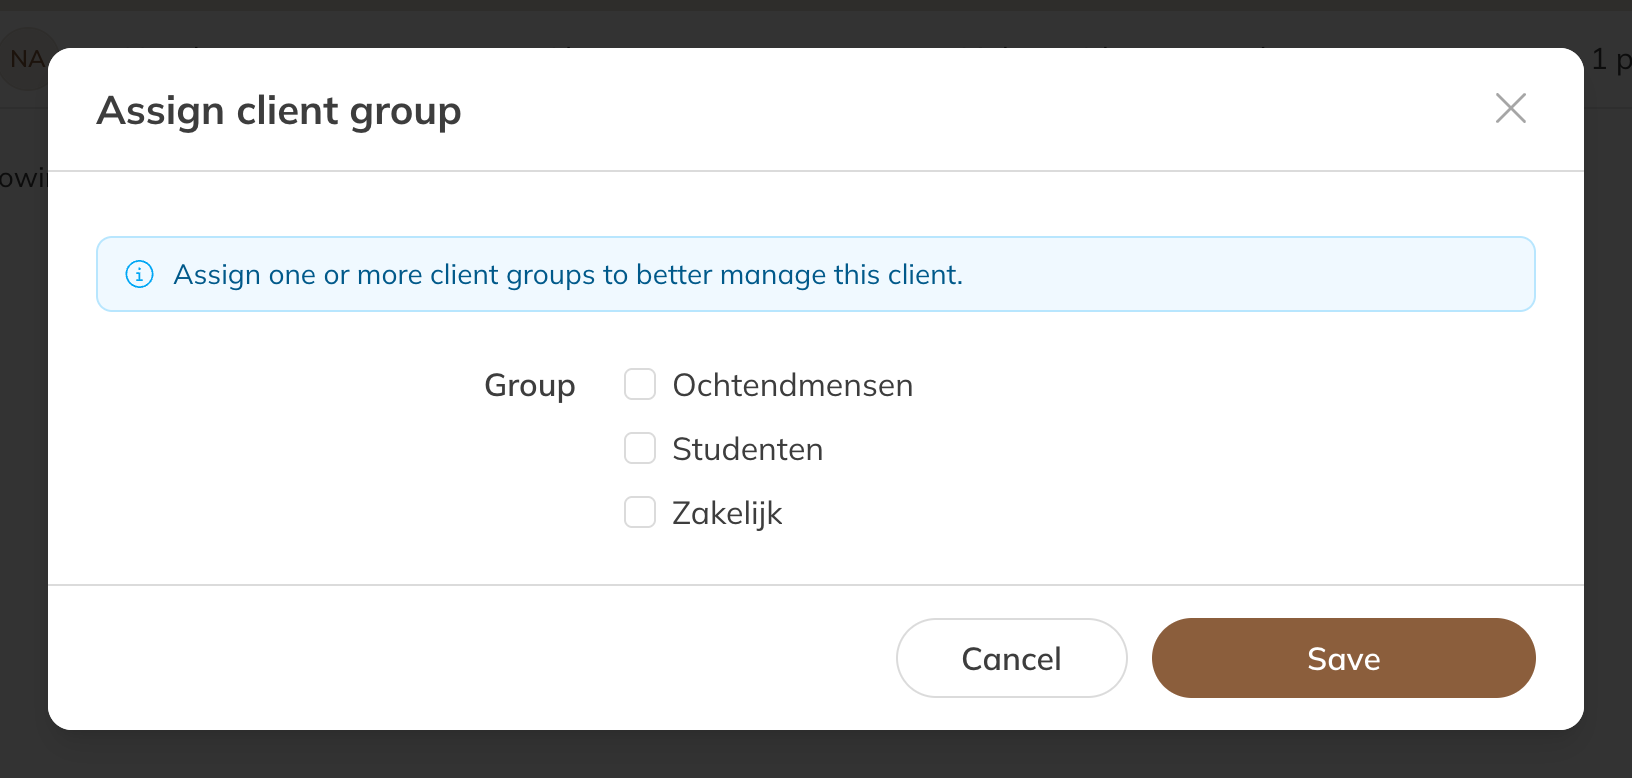
Assigning a client to a group
A client can be in several groups. If you remove a client from a group, they immediately lose access to anything that's only for that group.