How to integrate the Web Widget into your personal website
Estimated Reading Time: 6 minutes
Applies to: All plans
Quick Summary
The Web Widget allows you to embed your Schedule or your Webshop directly into your personal website.
This allows potential clients to view Activities, book sessions, and purchase products without leaving your website.
Why This Matters
Embedding the widget on your website keeps the booking experience within your brand environment.
It also helps convert website visitors into paying clients by allowing them to book Activities or purchase products instantly.
Step by Step Approach
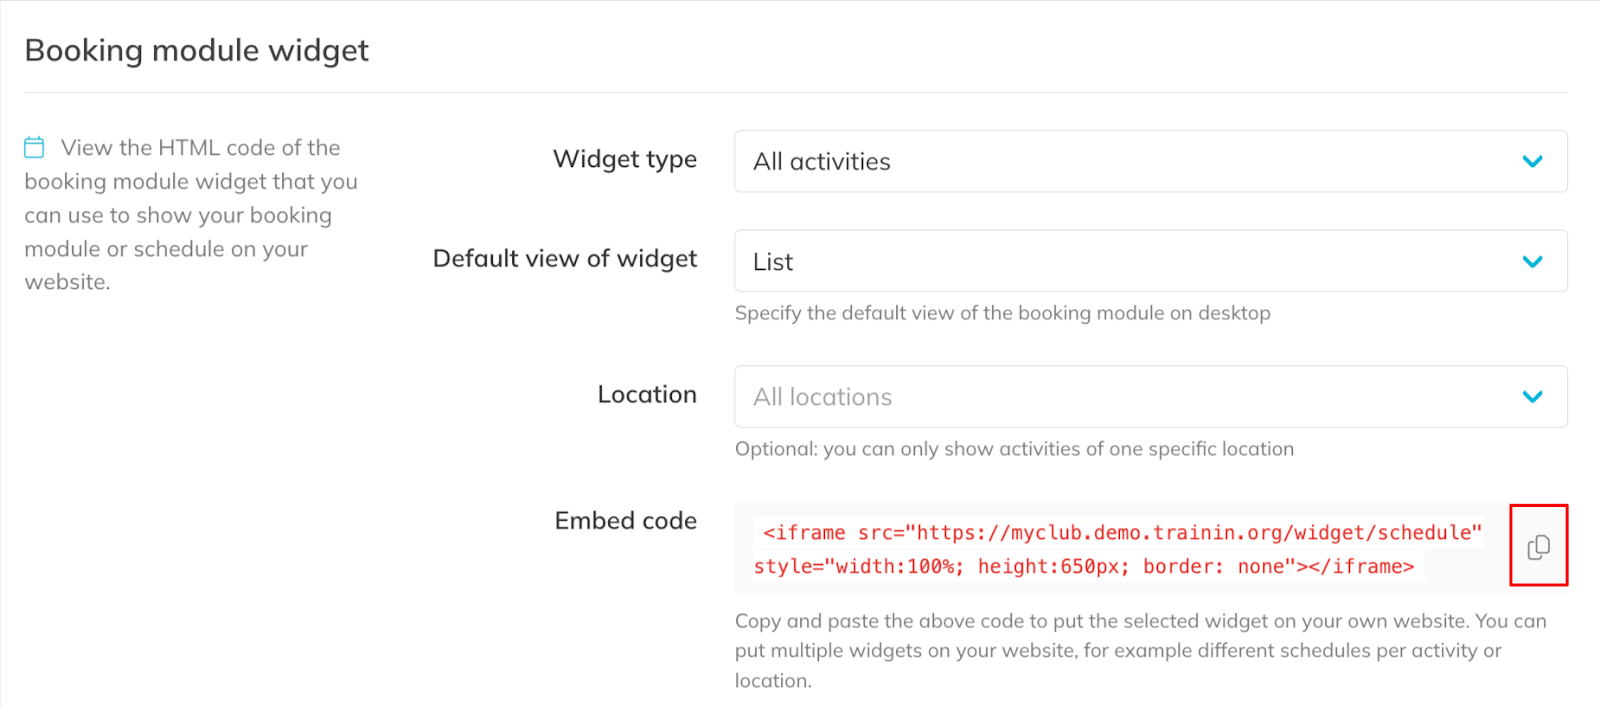
Booking Module Widget
Step 1: Open the booking widget settings: My Company > Integrations > Booking module
– This section allows you to configure how your Activities and schedule will appear on your website.
Step 2: Configure the widget display options: Booking module > Widget type / Default view of widget / Location
– Select which Activities or locations should appear and choose how the schedule is displayed for clients.
Step 3: Copy the booking module embed code: Embed code
– Copy the iframe code and paste it into the page of your website where you want the booking schedule to appear.
Webshop Widget
Step 4: Open the shop widget settings: My Company > Integrations > Shop
– This section generates the embed code for displaying your shop on your website.
Step 5: Copy the shop embed code: Shop > Embed code
– Paste the iframe code into your website to allow clients to purchase Memberships, Credit Packs, or other products directly.
Best Practice
Place the booking module on a dedicated “Book Now” or “Schedule” page so visitors can easily find where to book Activities.
Pro Tips
You can embed multiple widgets across different pages of your website. For example, one page can display your schedule while another page can display your shop.
If you want the widget to visually match your website, you can customize colors and styling in the widget customization settings.
You can modify the width and height values inside the iframe code so the widget fits correctly within your website layout. The default height is 650px, but it can be increased depending on your page design.
Common Questions
Can the widget be placed on any website?
– Yes. As long as your website supports HTML embedding, you can paste the iframe code.
Can I show only specific Activities in the widget?
– Yes. The widget settings allow you to control which Activities appear in the schedule.
Can I show only one location in the widget?
– Yes. The location filter lets you display Activities from a single location.
Can I adjust the size of the widget?
– Yes. You can change the width and height directly in the iframe embed code.
How can I customize the widget appearance?
– You can set the background color of all widgets and the colors of the date header in the Schedule widget via Customization (in Integrations menu)
– You can set the color of the book and buy buttons via Settings > App & portal.
Next logical steps
– How to customize your Web Widget appearance– How to configure Booking Module Widget filters and advanced settings