- Go to Finances and choose New sale → Create invoice. You'll also find it under the + at the top right, and in a client's profile.
- Under Client details, search for the client by name. If it isn't a client, choose Or checkout as a guest and enter their name and address.
- Under Invoice items, add one or more lines.
- Add Remarks if you like.
- Choose the Invoice options and click Create invoice.
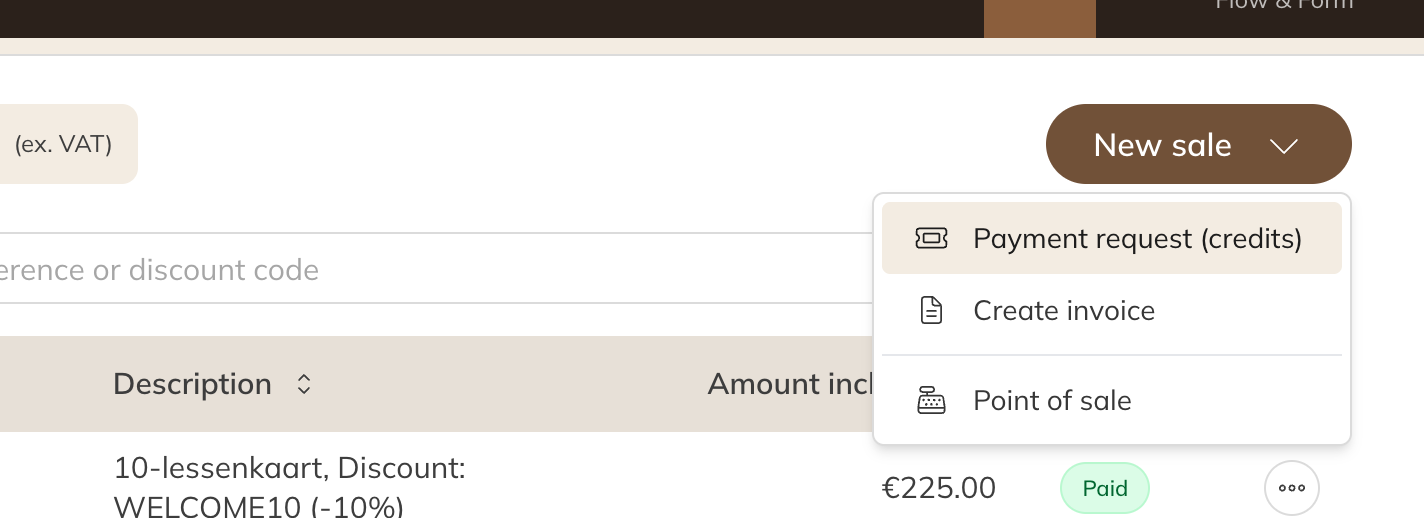
New sale
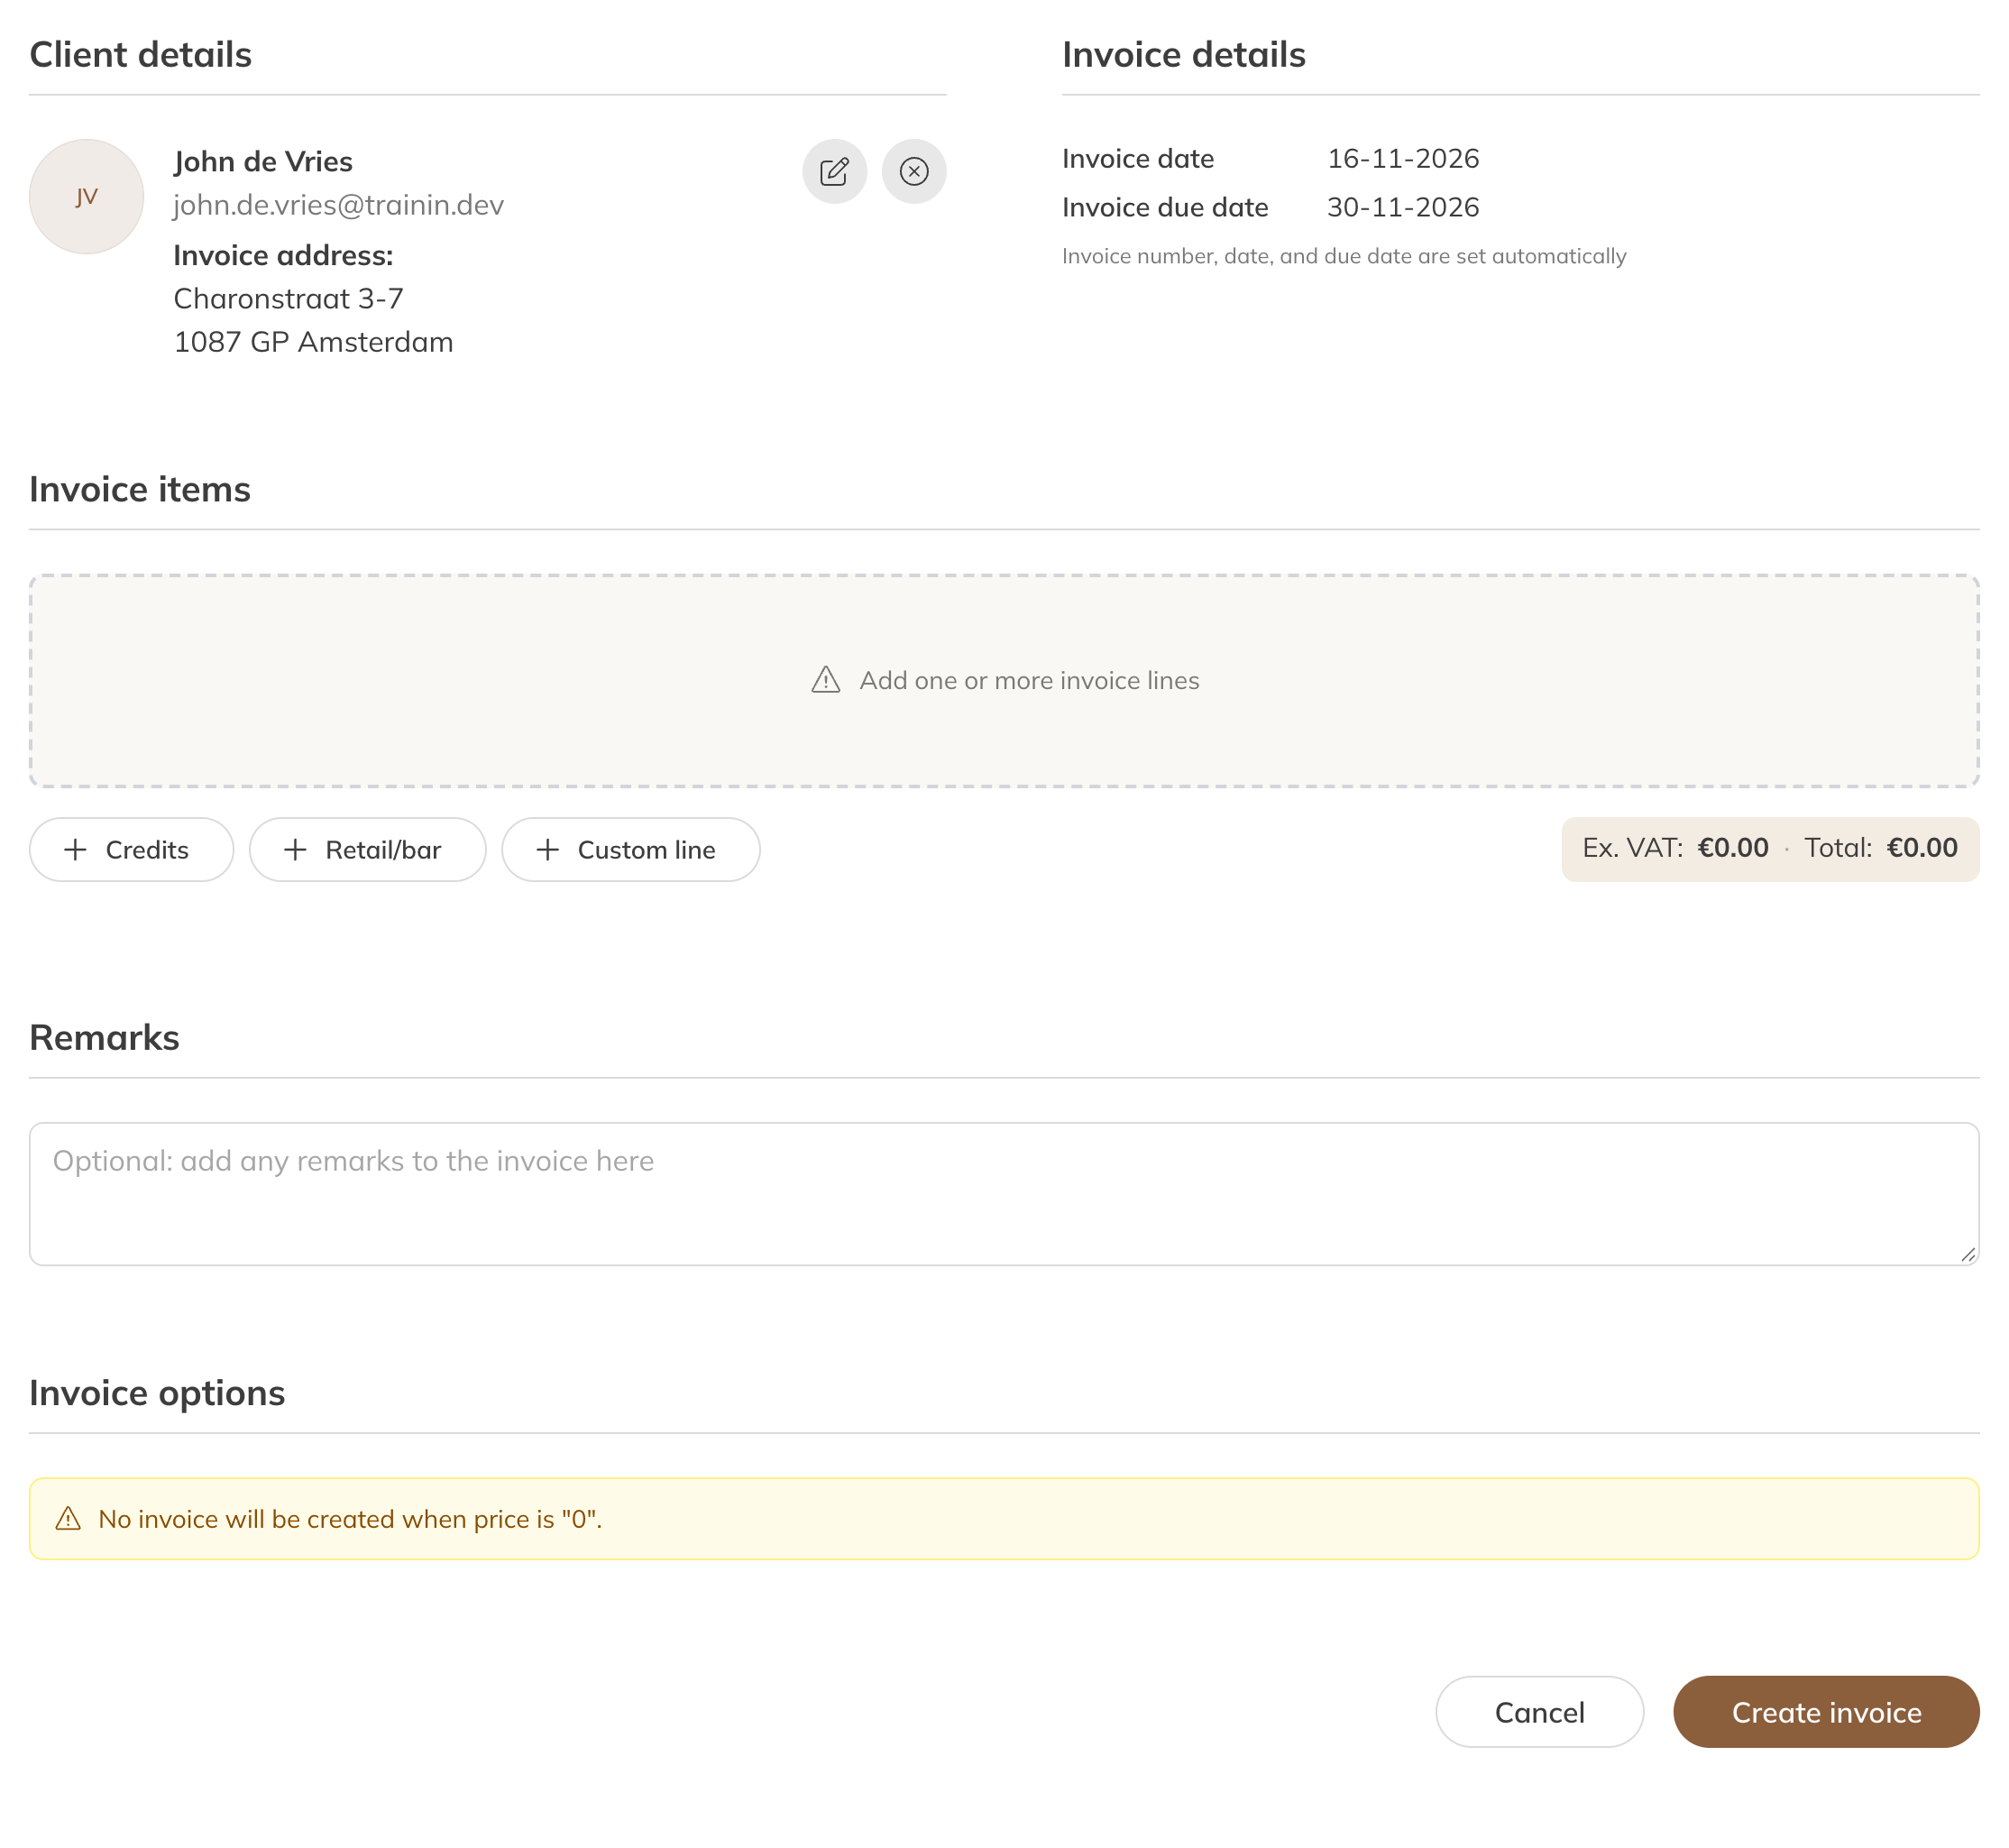
An invoice for a client
Client details
The name and billing address come from the client's profile. Use the pencil icon to change them for this invoice, for example a different name or company details. Tick Yes, save the new address details to the client profile if they should go into the profile too.
Note: An invoice needs a name and a complete address. If either is missing, you'll see Client address is missing or incomplete (required).
Invoice items
| Button | What you add |
|---|---|
| Credits | A credit product, such as a single class or a credit pack. The client gets the product once the invoice has been paid. |
| Retail/bar | A retail or bar product. |
| Custom line | A free line with a description, quantity, price and VAT, for something you don't have as a product in Trainin. The client then gets no product or credits, just the invoice. |
A membership with recurring payments isn't given through an invoice, but through Assign a product in the client's profile.
Invoice options
Under Create as you choose:
| Option | What happens |
|---|---|
| Invoice | The invoice is created straight away. The invoice number, invoice date and due date are set automatically; the due date follows from your payment terms. |
| Drafted | Save it without sending. You'll find the draft under Finances → Draft and can finish it later. |
| Planned invoice | Choose a Send date. The invoice is created and sent automatically on that date at 09:00. |
Under Payment options you choose how it gets paid:
| Option | What happens |
|---|---|
| Mark as awaiting payment | The invoice stays open and the client can pay online. |
| Collect payment automatically | Only for a client with a mandate: the amount is collected straight away by direct debit. |
| Mark as paid | The client has already paid, for example in cash. You choose the payment method; you can also split the amount over two methods. |
| Terminal | The payment is sent to your linked card terminal. |
For a planned invoice, you can only choose between the payment link and collecting automatically.
Finally, you choose whether the client gets an email. For example Send invoice with payment link, or Create invoice and send manually: no email is sent and you send the invoice yourself.
Note: If the total is € 0, no invoice is created.
Collecting an invoice straight away
If the client has a mandate, choose Collect payment automatically under Payment options. You can see whether a client has a mandate in their profile under Bank & payment details, on the Mandate line. See Changing the payment method for a client.
Creating an invoice for a payment afterwards
Has a payment come in without an invoice? In the three-dot menu of the payment, choose Create invoice.
Note: You can't delete an invoice once it's been created, and you can't change the amounts any more. If something's wrong, create a credit invoice. See Crediting an invoice.